Blog about iOS development. Code snippets, best practice, discussions, stories, jokes and tutorials - everything that I can't post on Stackoverflow.
Showing posts with label iOS. Show all posts
Showing posts with label iOS. Show all posts
Monday, March 11, 2019
How to Record Calls on iPhone
Here is another way involving a Mac and EarPods.
Attach EarPods to the Mac. Then attach the remote controller of the EarPods (which contains a microphone) to the iPhone. The microphone should be attached near the speaker. To fix it on the phone you can use a tape or a bulldog clip. Or just clamp it under the cover:
Use QuickTime to create a sound file. Click File > New Audio Recording. Since you attached your headphones to the Mac, the External microphone will be selected by default.
Then hit the red button to start the recording. Make a call.
The described technique doesn't require speaker mode and gives a good sound quality without noises. Your mouth is farther from the EarPods micro than the speaker of the iPhone. The distance compensates the differences in the sound volume, thus the both voices in the call will have similar loudness.
Saturday, June 30, 2018
Handling background touches: UIControl instead of UITapGestureRecognizer
Usually, to handle background touches on a View Controller we add a
What you need to do is just to change the root view type from
If any child control interrupts a touch, it wouldn't be delivered to the background control! This is the main pro and con of this method. Sometimes it's exactly the desired behaviour to ignore touches on buttons. But other times you need to handle all the touches anywhere in the View Controller, like if you have a large UITextView and you want to hide the keyboard by tap.
UITapGestureRecognizer. The setup requires a few lines of code, but there is a way, you can handle background touches even more easy!What you need to do is just to change the root view type from
UIView to UIControl and attach an action. With Storyboard:
-
Select the root view.
-
In the Identity inspector simply change the type to
UIControl. (Serious type change isn't required.)
-
Finally, connect an action to the Touch Down event using Connections inspector.
@IBAction func backgroundTouched(_ sender: Any) {
  // Hide keyboard
  view.endEditing(true)
}
If any child control interrupts a touch, it wouldn't be delivered to the background control! This is the main pro and con of this method. Sometimes it's exactly the desired behaviour to ignore touches on buttons. But other times you need to handle all the touches anywhere in the View Controller, like if you have a large UITextView and you want to hide the keyboard by tap.
Monday, June 4, 2018
How to convert HTML to NSAttributedString?
Well, simply don't. Use WKWebView instead.
This will allow you to insert pictures, reuse CSS-styles, execute scripts etc.
You may find many third-party solutions on GitHub (DTCoreText and many others). They can be faster, then the built-in converter, but still slower comparing to WebKit. I tried some, and they all were buggy and most are poorly supported after iOS7 release brought those "initWithHTML" methods.
The only advantage of NSAttributedString is the ability to put it in UI elements like UILabel or UIButton.
This all may seem overcomplicated to you, but once you implement the logic, you will have a very useful tool.
This will allow you to insert pictures, reuse CSS-styles, execute scripts etc.
Wait, why not to use NSAttributedString?
While Apple provides several methods to initialize an instance of NSAttributedString from an HTML data, like:init(data:options:documentAttributes:), they are all extremely slow, about 1000 times slower than WKWebView which is as fast as Safari itself. Additionally, NSAttributedString supports a limited set of HTML attributes.You may find many third-party solutions on GitHub (DTCoreText and many others). They can be faster, then the built-in converter, but still slower comparing to WebKit. I tried some, and they all were buggy and most are poorly supported after iOS7 release brought those "initWithHTML" methods.
The only advantage of NSAttributedString is the ability to put it in UI elements like UILabel or UIButton.
WKWebView example
Here follows super-advanced example demonstrating widest possible abilities of displaying rich and interactive text with HTML, CSS, and JavaScript. To make things convenient and reusable the HTML document is split into parts:Tutorial_main.html
The main HTML that contains necessary elements that supposed to be involved in every page of the tutorial. Including:- A
<head>block containing:- A raw CSS
<style>section, containing easy-configurable constants. - An external CSS
"stylesheet". - The extremely important
"viewport"<meta>tag, required to scale content of a WKWebView correctly. - A
<script>tag that provides Tutorial.js script. Not important enough to be listed here.
- A raw CSS
- A customisable
<body>section.
<html>
  <head>
    <style type="text/css">
      :root {
        --softTextColor: %@;
        --darkTextColor: %@;
        --actionColor: %@;
        --backgroundColor: %@;

        --bodyFontSize: %@;
        --titleFontSize: %@;
      }
    </style>
    <link rel="stylesheet" type="text/css" href="Tutorial.css" />
    <meta name="viewport" content="width=device-width, initial-scale=1.0" />
    <script src="Tutorial.js"></script>
  </head>
  <body>
    %@
  </body>
</html>
The %@ format specifiers will be replaced later with strings. Tutorial.css and Tutorial.js are contained in the Main Bundle root folder, so you don't need to specify baseURL to the WKWebView. Yes, you can refer local files, even use anchor links.Tutorial.css
body {
  color: var(--softTextColor);
  font-family: "-apple-system";
  font-size: var(--bodyFontSize);
  margin-top: 0px;
  text-align: left;
  -webkit-user-select: none;
  -webkit-touch-callout: none;
  background-color: var(--backgroundColor);
}

h1 {
  text-align: center;
  font-size: var(--titleFontSize);
  font-weight: 300;
  color: var(--darkTextColor);
  margin-top: 0.51em;
  margin-bottom: 0;
  margin-left: 0;
  margin-right: 0;
}

a {
  color: var(--actionColor);
  text-decoration: none;
}
It's handy to keep CSS in a separate file. You can see some constants which already were listed before.step2_body.html
<h1>Сonnection</h1>
<p>Connect your device to your computer using the USB cable.</p>
<div class="spoiler">
  <p>You can sync the device with iTunes using Wi-Fi.
  In this case you will need the USB cable only once: to activate wireless syncing.
  <a href="https://support.apple.com/en-us/HT203075">Read more.</a></p>
</div>
<div class="centered">
  <a class="showMoreButton" href="showmore://">
    <img src="show_more.svg" width=20 height=15 />show more
  </a>
  <a class="showLessButton" href="showless://">
    <img src="show_less.svg" width=20 height=15 />show less
  </a>
</div>
The body of the second step. Look at two buttons, there is something interesting about them. First, they use .svg images, because WKWebView supports vector graphics. (Images are also placed in the root directory of the Main bundle). Also, buttons use custom-scheme anchors, e.g.: href="showmore://". These anchors allows to intercept button clicks on the Swift-side using the webView(,decidePolicyFor:,decisionHandler:) method of WKNavigationDelegate.Assemble
Time to put all the things together.func assembleHTMLString(bodyFileName: String) -> String? {
// All resources are contained in the Main Bundle
let bundle = Bundle.main
guard let mainHTMLURL = bundle.url(forResource: "Tutorial_main", withExtension: "html") else {
print("No main HTML!")
return nil
}
// The contents of Tutorial_main is not just a String, it's a format (see below)
guard let mainHTMLFormat = try? String(contentsOf: mainHTMLURL, encoding: .utf8) else {
print("Failed to parse \(mainHTMLURL.lastPathComponent)!")
return nil
}
guard let bodyURL = bundle.url(forResource: bodyFileName, withExtension: "html") else {
print("No body with name \(bodyFileName)!")
return nil
}
guard let htmlBody = try? String(contentsOf: bodyURL, encoding: .utf8) else {
debugLog("Failed to parse \(bodyFileName)!")
return nil
}
// Prepare some necessary arguments...
let arguments = [
// Following values will be used as CSS constants
UIColor.lightGray.hexString, // softTextColor
UIColor.gray.hexString, // darkTextColor
UIColor.green.hexString, // actionColor
UIColor.white.hexString, // backgroundColor
"15px", // bodyFontSize
"22px", // titleFontSize
htmlBody // the body, yes
]
// And here we ASSEMBLE! Finally.
let assembledHTMLString = withVaList(arguments) {
// The `arguments` substitute %@ in the `format`, one by one.
(NSString(format: mainHTMLFormat, arguments: $0)) as String
}
return assembledHTMLString
}
Wondering where is hexString property of UIColor coming from? – Read about the Power of Extensions.Configure WKWebView
You can configure it on your own. But if you don't know how to disable zooming, here is some help:webView.scrollView.delegate = self
extension TutorialViewController: UIScrollViewDelegate {
func viewForZooming(in scrollView: UIScrollView) -> UIView? {
return nil // Just return nil here
}
}
When you have the assembled HTML string, there is not much left to do:
webView.loadHTMLString(assembledHTMLString,
                       baseURL: Bundle.main.bundleURL)
This all may seem overcomplicated to you, but once you implement the logic, you will have a very useful tool.
Saturday, February 3, 2018
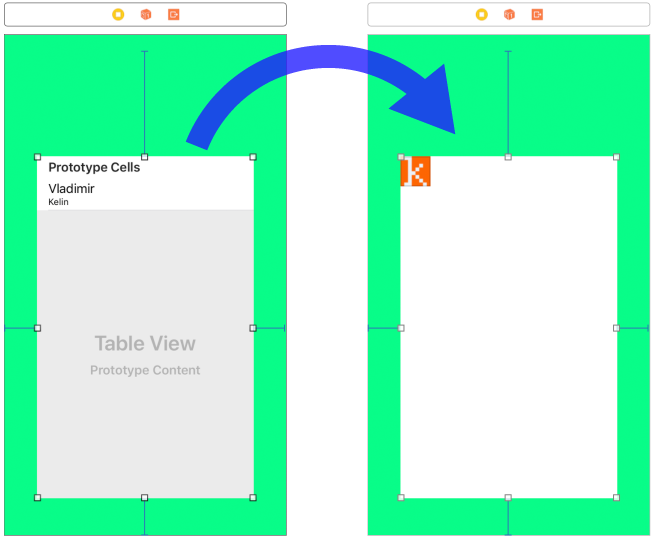
Changing view's type on the Storyboard

Suppose the design of your app changed, and now you need to replace the Table View with a Collection View keeping all the constraints along with views hierarchy.


Copy its id (example: id="8Oa-xL-ums"). It points to the view in constraints and outlets. Now find the new Collection View under the collectionView tag.

Copy everything including the enclosing tags:
<collectionView ...</collectionView> and paste it instead of the tableView. Replace Collection View's id with the value you copied from the Table View. Before switching back to Interface Builder you need to clean up the storyboard. Remove the scene of the temporary View Controller that you created at the beginning of the tutorial. Delete everything between tags and the preceding comment: <!--View Controller><scene ...</scene>. If you don't do this you will have an error because of duplicated id.

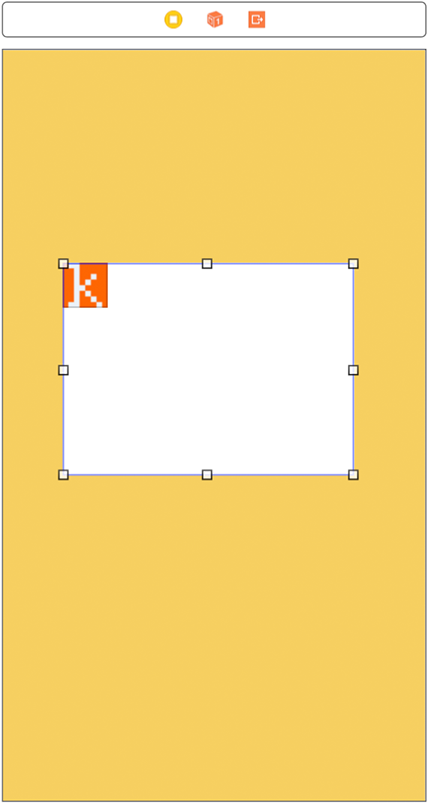
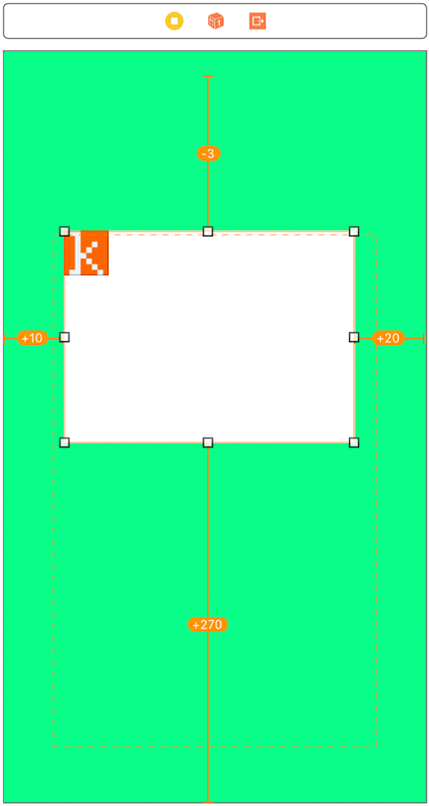
Now you will have the new Collection View constrained like the Table View but misplaced, because it's was copied with the rect.

Here is the list of storyboard tags for different UI classes. Who knows, may be it will be useful.
| arscnView | ARSCNView |
| arskView | ARSKView |
| glkView | GLKView |
| mapView | MKMapView |
| mtkView | MTKView |
| sceneKitView | SCNView |
| skView | SKView |
| activityIndicatorView | UIActivityIndicatorView |
| button | UIButton |
| collectionView | UICollectionView |
| datePicker | UIDatePicker |
| imageView | UIImageView |
| label | UILabel |
| navigationBar | UINavigationBar |
| pageControl | UIPageControl |
| pickerView | UIPickerView |
| progressView | UIProgressView |
| scrollView | UIScrollView |
| searchBar | UISearchBar |
| segmentedControl | UISegmentedControl |
| slider | UISlider |
| stackView | UIStackView |
| stepper | UIStepper |
| switch | UISwitch |
| tabBar | UITabBar |
| tableView | UITableView |
| textField | UITextField |
| textView | UITextView |
| toolbar | UIToolbar |
| view | UIView |
| containerView | UIView (with embedded View Controller) |
| visualEffectView | UIVisualEffectView |
| webView | UIWebView |
| wkWebView | WKWebView |
Saturday, January 27, 2018
Catching nil as Error
Github gist.
I've posted this as an answer on stackoverflow before, and the information was highly appreciated by some people. The question was like: “How to catch any error, specially unexpectedly found nil in Swift?" Though the author was asking about catching system errors, I decided to post my super-handy Unwrap Snippet there.
The idea of this approach is to replace multiple
Those who make apps with web backend will definitely like.
I've posted this as an answer on stackoverflow before, and the information was highly appreciated by some people. The question was like: “How to catch any error, specially unexpectedly found nil in Swift?" Though the author was asking about catching system errors, I decided to post my super-handy Unwrap Snippet there.
struct UnwrapError: Error, CustomStringConvertible {
  let optional: T?

  public var description: String {
    return "Found nil while unwrapping \(String(describing: optional))!"
  }
}

public func unwrap(_ optional: T?) throws -> T {
  if let real = optional {
    return real
  } else {
    throw UnwrapError(optional: optional)
  }
}
The idea of this approach is to replace multiple
if let and guard let statements with a single do-try-catch block. You can:
do {
  // Parse JSON and assign variables which were defined somewhere above
  let dictionary = try unwrap(JSONSerialization.jsonObject(
    with: data,
    options: .allowFragments) as? [String: Any])
  isAdsEnabled = try unwrap(dictionary["isAdsEnabled"] as? Bool)

  // While calling function which require a non-optional parameter in one line of code
  imageView.image = try UIImage(data: unwrap(receivedData))

  // And also you can simplify the building of multipart data
  var data = Data()
  data += try unwrap(dispositionString.data(using: .utf8))
  data += someContent
  data += try unwrap("\r\n".data(using: .utf8))

} catch error {
  // Handle error
  // ...

  // and exit
  return nil
}
Those who make apps with web backend will definitely like.
Friday, January 19, 2018
Safer parsing with JSONSerialization in Swift
Github gist.
Most people use the following snippet to get a value from an object provided by the JSONSerialization:
It's not obvious, but this code is unsafe. It can easily fail if the "name" value will be "111". In this case it may be decoded as
I didn't find any tutorial that would take this issue into account. All of them recommend to use
All objects produced by
Most people use the following snippet to get a value from an object provided by the JSONSerialization:
  guard let name = jsonDictionary["name"] as? String else { return }
  ...
It's not obvious, but this code is unsafe. It can easily fail if the "name" value will be "111". In this case it may be decoded as
NSNumber and casting to String will always fail. The same thing with numbers: guard let id = jsonDictionary["id"] as? Int else { return }
// id can be a "3" String!
...
A value like "3" can be decoded both as NSString and NSNumber (more often).I didn't find any tutorial that would take this issue into account. All of them recommend to use
as? to unknown JSON object to basic type. So I post here the correct snippets that will provide stable and predictable results in all possible cases.JSON helpers
extension String {
  init?(jsonObject: Any?) {
    guard jsonObject is NSNull == false else { return nil }

    let aNSObject = jsonObject as? NSObject
    if let description = aNSObject?.description {
      self = description
    } else {
      return nil
    }
  }
}

extension Int {
  var boolValue: Bool { return self != 0 }

  init?(jsonObject: Any?) {
    if let number = jsonObject as? NSNumber {
      self = number.intValue
    } else if let string = jsonObject as? NSString {
      self = string.integerValue
    } else {
      return nil
    }
  }
}

extension Bool {
  init?(jsonObject: Any?) {
    if let integer = Int(jsonObject: jsonObject) {
      self = integer.boolValue
    } else {
      return nil
    }
  }
}

extension Double {
  init?(jsonObject: Any?) {
    if let number = jsonObject as? NSNumber {
      self = number.doubleValue
    } else if let string = jsonObject as? NSString {
      self = string.doubleValue
    } else {
      return nil
    }
  }
}
All objects produced by
JSONSerialization are instances of NSString, NSNumber, NSArray, NSDictionary, or NSNull.
Tuesday, March 28, 2017
How to Install Ringtone on iOS
This detailed guide is intended to cover the whole process of ringtone installation on any iOS device, including iPhone, iPad and iPod. It's constantly updated to correspond to the latest versions of iOS, macOS and other related software, such as iTunes.
Step 2. Connection
Step 3. Import ringtones to iTunes
Step 4. Open Tones synchronization
Step 5. Sync
Step 6. Sound Settings
Step 7. Set the ringtone
Apps by me

 Connect your device to your computer using the USB cable.
You also may may have a look at the apps created by me: back to top
Navigation:
Step 1. PrerequisitesStep 2. Connection
Step 3. Import ringtones to iTunes
Step 4. Open Tones synchronization
Step 5. Sync
Step 6. Sound Settings
Step 7. Set the ringtone
Apps by me
Step 1. Prerequisites
To install a ringtone you will need:
- iTunes — a computer with iTunes on it.
- Lightning - USB — to connect the device to a USB port of the computer.
- .m4r — a ringtone file on your computer with .m4r extension.
Ringtones can't be longer than 40 seconds! Other tones (Text Tone, Reminder Alert) are limited to 30 seconds.
.m4r is an extension of MPEG-4 audio just like .m4a, but treated by iTunes as a ringtone. You can create .m4r simply by renaming an .m4a file. When you haven't .m4a file, you can convert it from any other audio format or download a new ringtone with the appropriate extension.
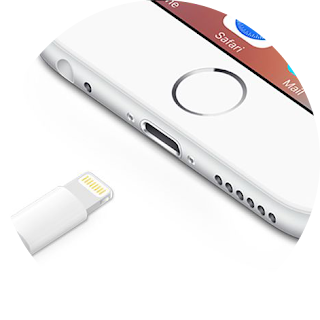
Older devices require Apple 30-pin to USB Cable instead of Lightning.
Step 2. Connection

You can sync the device with iTunes using Wi-Fi. In this case you will need the USB cable only once: to activate wireless syncing. Read more.
Step 3. Import ringtones to iTunes
- Open iTunes. Make sure that you have the latest version.
- Open your ringtones in the Finder.
- Drag and drop them to iTunes.
If you can't drop an .m4r file to iTunes, then try to select a different category in the top panel, for example Tones. In Tones category you can check ringtones duration or edit the name and other metadata.
Another way to import ringtones is to double-click them.
Step 4. Open Tones synchronization
- Click the device icon.
- Click Tones in left panel.
Step 5. Sync
- In the Tones section, check Sync Tones > Selected tones.
- In the appearing Tones list, select the tones you want to install to your device.
- Click Apply.
Custom tones which aren't included in the list will be removed from the device!
You also can select to sync All tones for simplicity.
Step 6. Sound Settings
- Open Settings > Sounds.
- Scroll to SOUNDS AND VIBRATION PATTERNS.
You also can set your tone to the alarm clock. Open the Clock app, go to Alarm > Edit. Select the alarm, touch Sound and select the imported ringtone from the list.
To setup sound for the specific contact open Contacts, and select the contact. Then touch Edit > Ringtone.
Step 7. Set the ringtone
- Go to Ringtone.
- Select your tone in the RINGTONES list.
To stop playing the selected sound, touch it again.
Music created with Garageband can be exported as a ringtone right on the device, bypassing iTunes.
*
If you have questions or suggestions, write a comment. If you found this guide useful, please share it with a friend!You also may may have a look at the apps created by me: back to top
Subscribe to:
Comments (Atom)


 My apps on the App Store