Showing posts with label Xcode. Show all posts

Thursday, October 18, 2018

UIKit protocol of the month: StoryboardInstantiatableViewController

Github Gist.

I want to share this little invention with the community. I use it for the last month and find it notably helpful: protocol StoryboardInstantiatableViewController { static var storyboardId: String { get } } extension StoryboardInstantiatableViewController where Self: UIViewController { static func instantiate(from storyboard: UIStoryboard?) -> Self? { return storyboard?.instantiateViewController(withIdentifier: Self.storyboardId) as? Self } }
This protocol along with the extension provides some syntactic sugar and solves two common problems:
  • Shortens the instantiation
  • Answers, where to store the storyboard id

Usage example:

// Declaration: class TaskViewController: UIViewController, StoryboardInstantiatableViewController { // The same id as specified in Identity inspector static let storyboardId: String = "task" // ... } // Initializing from Storyboard: // ... guard let taskVC = TaskViewController.instantiate(from: storyboard) else { return } navigationController?.pushViewController(taskVC, animated: true)

Update:

Surprisingly, I bumped into another similar protocol, named StoryboardInstantiatable. The main difference that it's designed for use with NSViewController and Cocoa instead of Cocoa Touch. The fact is, that the gist was posted 5 months earlier than this blog post. So Satori Maru is the first one who invented the idea, although I came to it independently.

Saturday, June 30, 2018

Handling background touches: UIControl instead of UITapGestureRecognizer

Usually, to handle background touches on a View Controller we add a UITapGestureRecognizer. The setup requires a few lines of code, but there is a way, you can handle background touches even more easy!

What you need to do is just to change the root view type from UIView to UIControl and attach an action. With Storyboard:
  1. Select the root view.
  2. In the Identity inspector simply change the type to UIControl. (Serious type change isn't required.)
  3. Finally, connect an action to the Touch Down event using Connections inspector.
Then the action can be utilized, for example, to hide a keyboard: @IBAction func backgroundTouched(_ sender: Any) { // Hide keyboard view.endEditing(true) }
If any child control interrupts a touch, it wouldn't be delivered to the background control! This is the main pro and con of this method. Sometimes it's exactly the desired behaviour to ignore touches on buttons. But other times you need to handle all the touches anywhere in the View Controller, like if you have a large UITextView and you want to hide the keyboard by tap.

Tuesday, May 22, 2018

Swift guidelines to follow

I started using Swift in my projects in 2015 and, as any Swift newbie, I was surprised by the lack of code style guidelines. Here I will share my experience of 3 years and point guidelines that worth following in different aspects of development.

Apple Swift API Design Guidelines provide great rules for naming. I also recommend to use Objective-C style prefixes for public extensions to avoid possible conflicts: /// MARK: Module XXX extension UIImageView { func xxx_loadImageFromURL(_ url: URL) { // ... } } // ... customImageView.xxx_loadImageFromURL(url)
Built-in Xcode formatter (^I) closes most questions with indentation. Just accept, that sometimes it can produce strange results, like this:
URLSession.shared.dataTask(with: apiURL) { (data, _, err) in }.resume() instead of this:
URLSession.shared.dataTask(with: apiURL) { (data, _, err) in }.resume()
Considering newlines, I recommend to follow good old Google Objective-C Style Guide, which is stating: "Use vertical whitespace sparingly."

All the rest is covered by The Official raywenderlich.com Guide. This guide is consistent and detailed, yet simple. It's widely adopted in different projects and tutorials, so it's well tested and recognizable. Note, that the guide is optimized for tutorials and sample code, which is good, because it's easy to read. But you can ignore some rules, like Minimal Imports or Use Type Inferred Context, because they don't improve reading but can slow down the writer.

While writing this post I found another style guide from LinkedIn. I don't recommend to follow it. Some rules listed there are obvious, some duplicate Xcode warnings, and some rules are disputable. The guide is way too strict, too large to remember, and thus it will be hard to adopt in your team.

Saturday, February 3, 2018

Changing view's type on the Storyboard


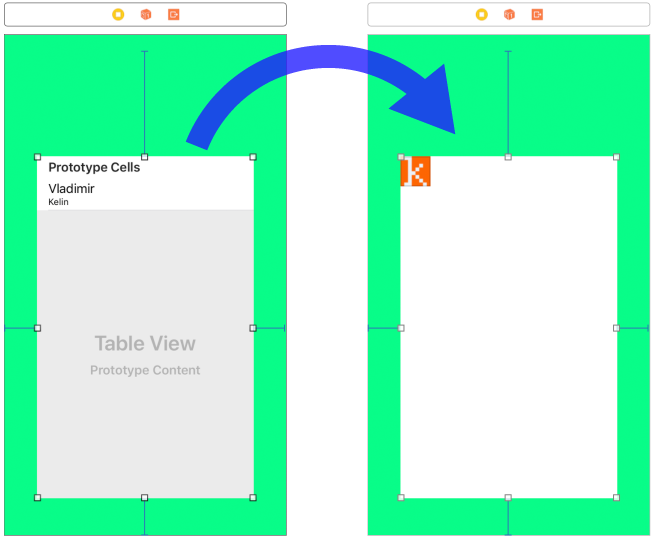
Suppose the design of your app changed, and now you need to replace the Table View with a Collection View keeping all the constraints along with views hierarchy.
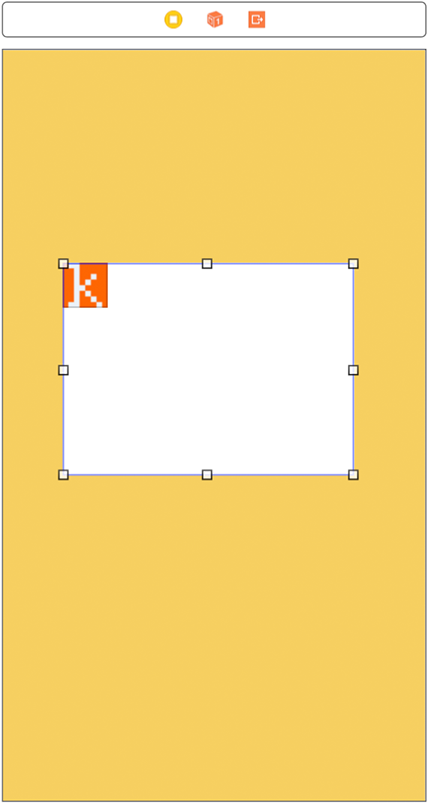
Drop a new View Controller on the storyboard and put a Collection View inside. Rename it in the left panel (called Document Outline). Name it "The Replacement" so you will be able recognize it later. Now switch to the Source Code through the Open As.
Now the storyboard looks like XML markup. Find the Table View you need to replace, it will be scoped within the tableView tag.


Copy its id (example: id="8Oa-xL-ums"). It points to the view in constraints and outlets. Now find the new Collection View under the collectionView tag.


Copy everything including the enclosing tags: <collectionView ...</collectionView> and paste it instead of the tableView. Replace Collection View's id with the value you copied from the Table View. Before switching back to Interface Builder you need to clean up the storyboard. Remove the scene of the temporary View Controller that you created at the beginning of the tutorial. Delete everything between tags and the preceding comment: <!--View Controller><scene ...</scene>. If you don't do this you will have an error because of duplicated id.


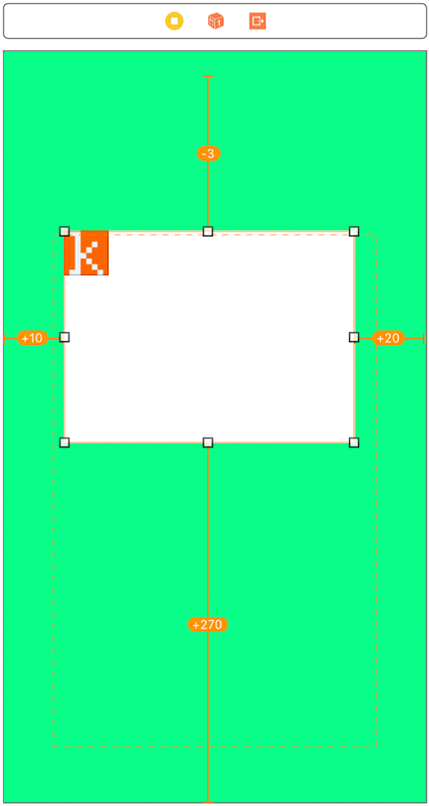
Now you will have the new Collection View constrained like the Table View but misplaced, because it's was copied with the rect.
Click Update Frames and enjoy the result!

Here is the list of storyboard tags for different UI classes. Who knows, may be it will be useful.

arscnView ARSCNView
arskView ARSKView
glkView GLKView
mapView MKMapView
mtkView MTKView
sceneKitView SCNView
skView SKView
activityIndicatorView UIActivityIndicatorView
button UIButton
collectionView UICollectionView
datePicker UIDatePicker
imageView UIImageView
label UILabel
navigationBar UINavigationBar
pageControl UIPageControl
pickerView UIPickerView
progressView UIProgressView
scrollView UIScrollView
searchBar UISearchBar
segmentedControl UISegmentedControl
slider UISlider
stackView UIStackView
stepper UIStepper
switch UISwitch
tabBar UITabBar
tableView UITableView
textField UITextField
textView UITextView
toolbar UIToolbar
view UIView
containerView UIView (with embedded View Controller)
visualEffectView UIVisualEffectView
webView UIWebView
wkWebView WKWebView

Friday, January 19, 2018

Safer parsing with JSONSerialization in Swift

Github gist.

Most people use the following snippet to get a value from an object provided by the JSONSerialization:
guard let name = jsonDictionary["name"] as? String else { return } ...
It's not obvious, but this code is unsafe. It can easily fail if the "name" value will be "111". In this case it may be decoded as NSNumber and casting to String will always fail. The same thing with numbers:
guard let id = jsonDictionary["id"] as? Int else { return } // id can be a "3" String! ... A value like "3" can be decoded both as NSString and NSNumber (more often).

I didn't find any tutorial that would take this issue into account. All of them recommend to use as? to unknown JSON object to basic type. So I post here the correct snippets that will provide stable and predictable results in all possible cases.

JSON helpers

extension String { init?(jsonObject: Any?) { guard jsonObject is NSNull == false else { return nil } let aNSObject = jsonObject as? NSObject if let description = aNSObject?.description { self = description } else { return nil } } } extension Int { var boolValue: Bool { return self != 0 } init?(jsonObject: Any?) { if let number = jsonObject as? NSNumber { self = number.intValue } else if let string = jsonObject as? NSString { self = string.integerValue } else { return nil } } } extension Bool { init?(jsonObject: Any?) { if let integer = Int(jsonObject: jsonObject) { self = integer.boolValue } else { return nil } } } extension Double { init?(jsonObject: Any?) { if let number = jsonObject as? NSNumber { self = number.doubleValue } else if let string = jsonObject as? NSString { self = string.doubleValue } else { return nil } } }
All objects produced by JSONSerialization are instances of NSString, NSNumber, NSArray, NSDictionary, or NSNull.

How to Record Calls on iPhone