Navigation:
Step 1. PrerequisitesStep 2. Connection
Step 3. Import ringtones to iTunes
Step 4. Open Tones synchronization
Step 5. Sync
Step 6. Sound Settings
Step 7. Set the ringtone
Apps by me
Step 1. Prerequisites
To install a ringtone you will need:
- iTunes — a computer with iTunes on it.
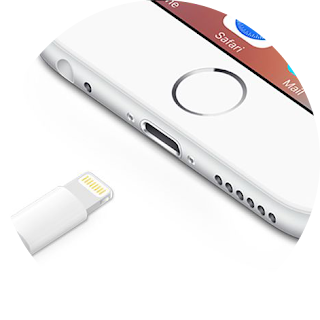
- Lightning - USB — to connect the device to a USB port of the computer.
- .m4r — a ringtone file on your computer with .m4r extension.
Ringtones can't be longer than 40 seconds! Other tones (Text Tone, Reminder Alert) are limited to 30 seconds.
.m4r is an extension of MPEG-4 audio just like .m4a, but treated by iTunes as a ringtone. You can create .m4r simply by renaming an .m4a file. When you haven't .m4a file, you can convert it from any other audio format or download a new ringtone with the appropriate extension.
Older devices require Apple 30-pin to USB Cable instead of Lightning.
Step 2. Connection

You can sync the device with iTunes using Wi-Fi. In this case you will need the USB cable only once: to activate wireless syncing. Read more.
Step 3. Import ringtones to iTunes
- Open iTunes. Make sure that you have the latest version.
- Open your ringtones in the Finder.
- Drag and drop them to iTunes.
If you can't drop an .m4r file to iTunes, then try to select a different category in the top panel, for example Tones. In Tones category you can check ringtones duration or edit the name and other metadata.
Another way to import ringtones is to double-click them.
Step 4. Open Tones synchronization
- Click the device icon.
- Click Tones in left panel.
Step 5. Sync
- In the Tones section, check Sync Tones > Selected tones.
- In the appearing Tones list, select the tones you want to install to your device.
- Click Apply.
Custom tones which aren't included in the list will be removed from the device!
You also can select to sync All tones for simplicity.
Step 6. Sound Settings
- Open Settings > Sounds.
- Scroll to SOUNDS AND VIBRATION PATTERNS.
You also can set your tone to the alarm clock. Open the Clock app, go to Alarm > Edit. Select the alarm, touch Sound and select the imported ringtone from the list.
To setup sound for the specific contact open Contacts, and select the contact. Then touch Edit > Ringtone.
Step 7. Set the ringtone
- Go to Ringtone.
- Select your tone in the RINGTONES list.
To stop playing the selected sound, touch it again.
Music created with Garageband can be exported as a ringtone right on the device, bypassing iTunes.
*
If you have questions or suggestions, write a comment. If you found this guide useful, please share it with a friend!You also may may have a look at the apps created by me: back to top
 My apps on the App Store